Filmmaking Basics/List of lessons
| |||||||||||||||||||||||||||||||||||||||||||||||||||||||
| Your Current Location | |
| Page: | List of lessons |
| Course: | Course #01 - Basic Filmmaking |
| Department: | Narrative Film Production |
| Division: | Film and Television |
| Portal: | Fine Arts Portal |
| School: | Art and Design |
| Faculty: | Humanities |
| University: | Wikiversity (English) |
List of Lesson in WikiU Film School Course #01 - Basic filmmaking at Wikiversity

|

The formatted scripts from the lesson on "Script Formatting"
Version: The Live-Action Script
Click on the word assignment to see the actual pdf document.
Version: The Animation Script
Unique scripts
|
|
Completed assignment - Script formatting
June 3, 2010 -- Macurik has formatted the script with Free Final Draft 8. You can download it at Media:Macurik_Seduced by the dark side.pdf. xxx |
2

|
3
4

|

|
5
6

|
7
8
9
10

|
11

|
12
13
14
15
16
- Reference materials: the Storyboard Worksheet • the Original Story · the Script Outline · all the Storyboard Frames · the Formatted Script · a Floor Plan.
|}
Old List of Lesson in WikiU Film School Course #01 - Basic filmmaking at Wikiversity
Lesson 1. Formatting the Script
WikiU Film School → Lesson #001 - Formatting the Script
- This is the first lesson of the Course #01 - Learning the Basics of Filmmaking. You are given a very simple story for a short movie (60 seconds) called Seduced by the Dark Side!. Your first step is to format this script. People in Hollywood expect a movie script in a specific format. If you cannot format your script properly, you will be ignored. Being ignored in Hollywood is not good!
- Also, this lesson is an introduction to the script typing and formatting program called Final Draft. This program is available in a FREE demo version which is fully working for short scripts... including saving and printing (with watermarks) short scripts. This program comes with a tutorial to show you all the features of Final Draft. Download the free demo version and take a look.
- The pages of this lesson…
- Title Page - About this lesson & a brief look at our immediate plans and goals → Start Here to begin the WikiU Film School.
- Page 1 - The story for Seduced by the Dark Side!
- Page 2 - Analyze the story for Seduced by the Dark Side!
- Page 3 - Learning Final Draft
- Page 4 - Typing the script
|
Lesson 2. Study the Way Movies are Filmed in Hollywood
WikiU Film School → Lesson #002- Understanding how movies are made → Under Construction
- This Lesson can be described as "Watching Movies" and Lesson #3 can be described as "Making Decisions".
- In this lesson, we watch movies (edited and unedited) to study the filmmaking process and to get ideas.
Watching movies is a tough job... but someone has to do it. It might as well be you!!!!
- The pages of this lesson…
- Title Page - Very short introduction
- Page 1 - The Basic Filmmaking Process
- Page 2 - Analyzing the movie George Lucas in Love
- Page 3 - Watching how real scenes are broken down and filmed in Hollywood.
Lesson 3. Decide How the Movie will be Made ↔ Script Breakdown
WikiU Film School → Lesson #003: Planning the Movie → Under Construction
- To plan a movie, you need to decide how the movie will be filmed and such mundane tasks as the aspect ratio, the frame size and the lenses.
- The pages of this lesson…
- Title Page - About this lesson
- Page 1 - Overall → Start here!
- Page 2 - Filming
- Page 3 - Animation
- Page 4 - Aspect Ratio & Frame Size
Lesson 4. The Most Important Step - Drawing the thumbnail storyboards
WikiU Film School → Lesson #004: Creating the Thumbnail Storyboards
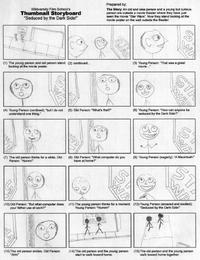
- The most important steps is storyboarding. And the simplest storyboards of all is thumbnail storyboards. You make all the important decisions for the movie when you create the thumbnail storyboards so this is the most challenging lesson of our course.
- Lesson #004 - The Thumbnail Storyboards
- Page 1. Lesson summary with links to require reading.
- Page 2. What are thumbnail storyboards?
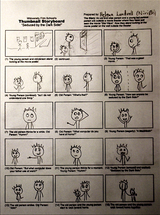
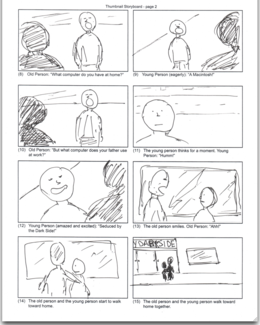
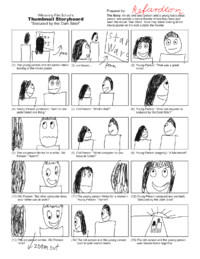
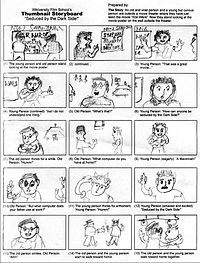
- Page 3. Example storyboards for our movie.
- Page 4. What software do I need for thumbnail storyboards?.
- Page 5. Pre-Visualization for thumbnail storyboards.
- Page 6. How to draw thumbnail storyboards with ArtRage 2.
- Page 7. How to draw thumbnail storyboards with Photoshop.
- Page 8. Using the library of storyboard frames.
- Reference materials: the Storyboard Outline • the Original Story · all the Storyboard Frames · the Formatted Script · a Floor Plan.
| This lesson should take only 15 minutes to draw the thumbnail storyboards with pencil and paper. | |
|
Problem
|
It takes too long to get the thumbnail drawings into the computer. |
|
Solution #1
|
Mail me your pencil and paper storyboard sketches. |
|
Solution #2
|
Tell me the numbers of the Thumbnail Examples which match your storyboards. |
Special Note: The first ten students who complete a good set of totally original thumbnail storyboards will received a free copy of the "Follow Dave?" Editing Workshop CD from the Star Movie Shop which hopefully works on both the Macintosh and Windows. The "Follow Dave?" Editing Workshop CD is a good introduction to film editing for narrative motion pictures with scripted dialog.
|
Lesson 5. Creating the Temp Score
WikiU Film School →Creating the music (rough) → Under Construction
- To calculate the timing for this movie, you must first create the narrative music for this motion picture.
- The pages of this lesson…
- Lesson #005: Music - Creating the temp track - This is a simple introduction to film scoring.
- Page 1 - What is Narrative Film Music
- Page 2 - What tools to we need for film scoring
- Page 3 - Creating a film score for Seduced by the Dark Side!
Lesson 6. Recording the Dialog
WikiU Film School → Recording the dialog for the animatic → Under Construction
- We are going to create an animatic from the 3D storyboards. This is a movie created from the still artwork. To do this, we need voices of the characters in the animatic. This is only very rough, not necessarily the voices needed for production.
- The pages of this lesson…
- The Title Page
- Page 1 - The Software
- Page 2 - The Hardware
- Page 3 - The Room
- Page 4 - Self Recording
Lesson 7. Editing the Animatic
WikiU Film School → Editing the animatic → Under Construction
- To create an animatic from the 3D storyboards, we need to edit it like a slide show.
- The pages of this lesson…
- The title page
- Page 1 - Editing For Audio
Lesson 8. The Camera Lens creates the Mood - All about Camera Lenses

|
| |
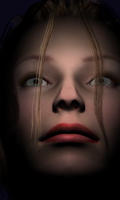
| 24 mm Mood is cold and distant |
50 mm No distortion is boring |
200 mm Mood is warm and close |
| Can you see the difference? |
.
WikiU Film School → All about Lenses → Under Construction
- Using a program like DAZ Studio which is free, you can learn how the selection of the lens for a shot will effect the mood of the shot.
- The pages of this lesson…
- Lenses •Introduction to All about lenses.
- Lenses •Learning how focal length creates mood.
- Lenses • Learning how depth of field focuses attention.
- Lenses •Learning about lenses using FrameForge 3D Studio 2
- Lenses •Learning about lenses using DAZ Studio
Look at the three pictures to the right above. Can you see the difference? More importantly, can you feel the difference between the two outer images? The first image is filmed with a 24 mm lens (a very wide angle lens which makes things look cold but bold), the second is filmed with a 50 mm lens which has no distortion, and the third was filmed with a 200 mm lens (a strong telephoto lens used for dramatic portraits which makes things seem warm and close.) Note: The focal lengths of the lenses are based on 35 mm still camera lenses.
Lesson 9. 3D Human Models, 3D Costumes, and Movie Set for the Animated Version of Our Movie
WikiU Film School → Selecting the models for the animated version → Under Construction
- We have to select the models for the animated version of this movie.
- The pages of this Lesson…
- Title Page
- Page 1 - DAZ 3D figures
- Page 2 - Poser Figures
- Page 3 - Koshini and Friends
Lesson 10. Creating 3D Storyboards
WikiU Film School → Creating a 3D Storyboard → Under Construction
- Using FrameForce 3D Studio 2 demo version, you can create very useful 3D storyboard artwork.
- The pages of this lesson are…
- Introduction to FrameForge 3D Studio 2 Demo
- Building our movie set inside FrameForge
- Creating the frames of the storyboard with FrameForge
- Sample 3D Storyboard Created with FrameForge
Lesson 11. Movie Props - The Star Wars Poster
- Making the props - The Star Wars poster - The movie set has a poster from Star Wars. We will not use a real Star Wars poster for two reasons. One is the problem with rights. The other problem is a detailed posters will be too hard to view. We need a very simple poster that looks like a Star Wars poster but is not.
- The pages of this Lesson…
Lesson 12. Marketing campaign to potential distributors
- Creating the marketing campaign to potential distributors - As early as this seems, we need to start worrying how we will find the right distributor. To do this, we must plan ahead. This is an informational lesson with no assignment other than giving me suggestions.
- The pages of this Lesson…
- Selecting the lighting for the movie set for the animated version - We have to light the movie set inside the computer. → Next Year
- Character animation for the animated movie - We have to animate the characters for the animated version of the movie. → Next Year
- Editing the animated movie - We have edit the animated version of the movie. → Next Year
- Designing and creating the sounds for the ambiance - We have to decide what sounds are needed for the ambiance for this movie. → Next Year
- Designing and creating the sounds for the Foley - We have to record the Foley sounds for the ambiance for this animated movie. → Next Year
- Recording the musical sounds for the movie - We have to create the musical sounds for this movie. → Next Year
- Creating the matte paintings for the movie - live action - We have to create the matte paintings for the live action movie. → Next Year
- Compositing the matte painting - live action - We have to combine the matte paintings for the live action movie with the actual filming of the movie. → Next Year
Live Action
- Budgeting For Live Action - Breaking down the script into actual live action expenses. → Next Year
- Financing the Live Action - Financing the live action version of this movie]] - We have to determine how much money we need and then we have to find it. → Next Year
- Constructing the Movie Set - Planning and constructing the movie set for a live action shoot]] - We have to build a movie set. → Next Year
- Lighting the Movie Set - Selecting the lights for the movie set for a live action shoot]] - We have to light the movie set. → Next Year
- Hiring the Crew - Selecting the crew for a live action shoot]] - We have to find a crew for this movie. → Next Year
- Casting the Actors - We have to audition and select the cast. → Next Year
- Casting the Actors - Finally we film the live action version. → Next Year
- Edit the movie - We have edit either the live action or the animated version of the movie. In both cases, this is done the same way. → Next Year
- Designing and creating the sounds for the ambiance - We have to decide what sounds are needed for the ambiance for this movie. → Next Year
- Designing and creating the sounds for the Foley - We have to record the Foley sounds for the ambiance for this movie.
- If you don't know who Jack Foley was, go to this wonderful website at www.marblehead.net/Foley/jack.html
- Re-record the dialog - We have to replace the dialog for this movie using ADR. → Next Year
- Recording the musical sounds for the movie - We have to create the musical sounds for this movie. → Next Year
- Creating the matte paintings for the movie - live action - We have to create the matte paintings for the live action movie. → Next Year
- Compositing the matte painting - live action - We have to combine the matte paintings for the live action movie with the actual filming of the movie. → Next Year
Distribution/Exhibition
- Creating the titles - We have to create the titles and credits for both the animated and the movie. → Next Year
- Prepare the movie's elements for distribution - Creating the titles]] - We have to prepare the movie for distribution. → Next Year
- Creating the foreign dubs - We have to create the foreign dubs for this movie. → Next Year
- Authoring the disk - We have to create layout and design of the DVD-Video release. → Next Year
- Creating the posters, etc. - We have to create the posters, jacket, and slicks for this movie. → Next Year
- Accounting - We have to account for the finances of the movie. → Next Year
Reference materials
- Reference materials for Seduced by the Dark Side! that you might need.
- All the thumbnail storyboard frames. A copy of all the thumbnail storyboard fremes.
- The storyboard worksheet. The is the worksheet for doing the storyboard.
- The original story of "Seduced by the Dark Side!". The original story that is the basis of our movie.
- The A short and simple outline of the script. This is a trimmed down version of the worksheet.
- The formatted script. The is the best formatted script (pdf).
- A possible floor plan for the movie set.
WikiU Film School Activities
- Our First Annual Meeting will be at Macworld Expo, January 2007.
Your Teachers at the Wiki Film School
- Instructor: Robert Elliott. To email me, Click Here.
Short Cut to Lessons
Portal:Filmmaking:WikiversityFilmmaking Courses at Wikiversity
.
|


