3D Modelling/Examples/Red-Green Anaglyph
Appearance
< 3D Modelling | Examples


Red-Green Anaglyph Videos and Images
[edit | edit source]The 3D perception is determined by the provision of different images to each eye. Red-Green Anaglyphic Videos and Images use implement this concept by combining a red and an green image into one image.
Examples Images/Videos
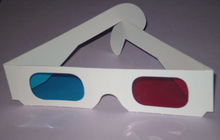
[edit | edit source]The 3D effect can only be seen with a low cost paper red-green glasses:
- Series of 3D-images concatenate in a Youtube-Video[1]
- Steam Train in Turkey (Youtube)[2]
- Grand Canyon
- Anaglyph 3D Video Animation - Cartoon Full HD Red Cyan Movie with Blender
- Red/green anaglyph: Glasses
- GIMP Plugin Fu-Script for Red-Green Anaglyph Images
- Combine 3D Modelling and Animation and anaglyph 3D view
Learning Task
[edit | edit source]- Explain how you could use a 3D model of a building (e.g. created with Photogrammetry to generate Anaglyph 3D images.
- Shift the camera view in eye distance horizontally for the 3D model of your choice and export the two images of the camera view.
- Process the left and right image as Anaglyph 3D image.
Options to Create Anaglyph Images
[edit | edit source]- Take TWO snapshots of the same object (move 4cm/1.5in to right - avoid up/down movement). Use GIMP with add a new script-fu folder e.g.
Documents/GimpScripts. Store the anaglyph script fromscript-fu-make-anaglyph.scm[3]. - Learn how to install the Anaglyph script in GIMP step by step.
| Left Image | Right Image | Anaglyph Result |
|---|---|---|
 |
 |
 |
- Remark: You see that,
- the cyan image shifted to the left and
- the red image shifted to the right.
- place the filters of the glasses as follows:
- cyan filter is placed before the right eye and
- red filter is placed before the left eye (opposite of shift of colored images)
- Create an anaglyph Video in Blender.
Crop Overlapping Area
[edit | edit source]Crop the overlapping area of the object in ONE image. The shift of one image to match specific elements in the left and right eye image determines the size of the overlapping area. The single eye image are processed with a red and cyan/green filter and to the colored images are merged into one image with opacity of the layers.
Create Red-Green 3D Anaglyph Media
[edit | edit source]- (Images and GIMP) See 3D Red/Cyan Image Creation in GIMP Tutorial by Roy Lee (2011) Youtube Video[4]
- (Videos and Blender) Anaglyph (3D Glasses) Tutorial (Blender 2.75+) by BenU[5]. The tutorial will also include
- the download of a 3D model for Blender,
- animations in Blender,
- creating the 3D anaglyph video finally.
Learning Task
[edit | edit source]- Learn about the generation of Anaglyph 3D images.
- Learn how to install the Anaglyph script in GIMP step by step.
- Explain why the two images for the OpenSource Anaglyph Plugin in Gimp needs a horizontal shift of about 3-4cm to generate the 3D illusion with the Red-Green-glasses.
- Explain the purpose of the color filters of your 3D glasses.
See also
[edit | edit source]- Anaglyph 3D
- Stereoscopy
- Photogrammetry
- Demo images for left and right eye for anaglyph 3D experiments
References
[edit | edit source]- ↑ 3D video Brille Rot + Grün nötig by Florian Andres (2012) - https://www.youtube.com/watch?v=bIpjZhq8H44 - (accessed 2018/01/08)
- ↑ 3D Video anaglyph - Mit Dampf durch die Türkei - Steam train in Turkey (2011) Eisenbahn TV - URL: https://www.youtube.com/watch?v=Lu1GhEBph-w (accessed 2018/01/08)
- ↑ Anaglyph Plugin - Fu-scripts (2021) - https://github.com/karlhof26/gimp-scheme/blob/master/make-3d-anaglyph.scm (accessed 2021/11/02)
- ↑ 3D Red/Cyan Image Creation in GIMP Tutorial by LearnRoyLeePhoto (2011) - https://www.youtube.com/watch?v=q7a-1rvvaEc (accessed 2018/01/09)
- ↑ Anaglyph (3D Glasses) Tutorial (Blender 2.75+) by Ben U (2015) - https://www.youtube.com/watch?v=e3I4OwLuZag (accessed 2018/01/08)
