Jump to content

Storyboard Artwork Project/Options

From Wikiversity


This school is:
Wikiversity Film School - Narrative film production
This course is:
The basics of narrative filmmaking
This lesson is:
Creating the thumbnail storyboards
The pages of this lesson are:
Introduction - Creating the thumbnail storyboards

If you have problems:
Things to worry about! ("Crossing the line.")
More things to worry about! (Eyeballs & cameras)


Optional: Other storyboarding options

The two parts of storyboarding:

The challenge of storyboarding is two fold:


  • Step 1 - Breaking down the scene.
Breaking the scene down means deciding which shots will be filmed. For each shot, you must decide the camera angle, the camera lens, the camera movement, the actor's movements. At the same time, you must decide the flow of the story from shot to shot.


  • Step 2 - Drawing the pictures.
Once you have made these decisions, you must draw thumbnail storyboards to communicate this information to me and the rest of our jolly crew who will work on your movie. We don't know what you are thinking unless you draw us a picture.


  • Send me your thumbnail storyboard frames.
When you are finished, send me your individual storyboard frames. I will create the storyboard for you.
Be sure to let me know what you are doing. You can email me by Clicking Here.

Begin now!

Print out this worksheet and begin.
Just print out the Storyboard Worksheet and decide what the audience should see.
That is all you have to do in this lesson.
Note:15 minutes maximum
Creating the thumbnail storyboards with pencil and paper should take only 15 minutes. If you spend more than 15 minutes on that part of the lesson, you are trying too hard. Keep it simple!

How to submit your thumbnail storyboards

You can submit your storyboards in at least four different ways.

Creating the thumbnail storyboards

This is the most important and challenging lesson in the whole course. Here you make the creative decisions.

In this lesson, you create the motion picture… with pencil and paper! In this lesson, you break down the scene into individual shoots and you draw the thumbnail storyboards for all the shots.

Many filmmakers say that once you have completed the storyboards for a movie, you have completed the movie.


If you have problems...

If you have problems visualizing the scene, immediately go to the next lesson which uses the fantasitic demo program, FrameForge 3D Studio.

Option 1 - Pencil and Paper Thumbnail Storyboards
  • Send me your individual thumbnail storyboards. (Scan the images, scan the page into your computer or mail me your thumbnail storyboards.)
Option 2 - Refer to our library of storyboard frames
  • Tell me which frames you want by looking at our library of possible frames for this movie.
Option 3 - Draw the thumbnail storyboards into your computer
  • Draw your frames into the computer using ArtRage2, Photoshop, or other software.
Option 4 - Storyboard Artwork Project
  • Once the Storyboard Artwork Project produces stamps for Tux Paint (or other program), you will be able to quickly and easily draw your frames using the free Tux Paint.
FrameForge 3D Studio Demo Version


Or just go to next lesson...
  • If you wish, you can skip all of this and go to the lesson: Create the 3D storyboard. In that lesson, you use FrameForge 3D Studio demo version to create the storyboard frames.
This project turns Tux Paint into a storyboarding program for narrative filmmaking. This course shows you how to create special stamps which turn Tux Paint into a very simple storyboarding program similar to Storyboard Quick] and Storyboard Artist.
Tux Paint is a fun drawing program for kids. It allows kids to add pictures called "Stamps" to their artwork. Storyboard Quick and Storyboard Artist also uses stamps to draw storyboards but, unlike Tux Paint, these programs are not free. These special stamps are pictures of people in various poses, viewed from many different angles. Storyboard Quick uses hand drawn pictures of people while Storyboard Artist uses 2D pictures from Poser.
Anyone who likes to draw figures or is learning to use Poser or DAZ Studio can participate. All you have to do is create poses of people viewed from many different angles. The first two pages of instructions are up. Click here to take a look! Then email me! Robert Elliott
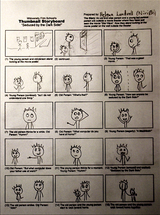
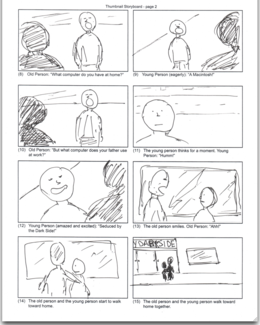
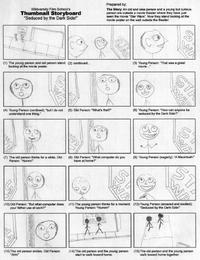
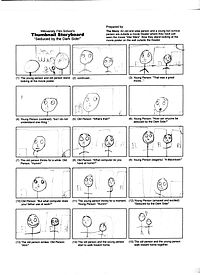
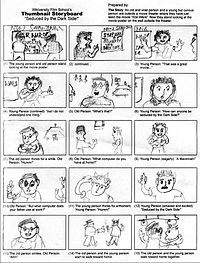
Thumbnail storyboards from the lesson on Thumbnail storyboarding


Click on the image to see larger version.

Kasturika has completed this assignment (pdf) (23 May 2007) Good job! 10 points

Kasturika says, "I used the Microsoft paint application.

I took a screen shot of the storyboard, converted it into bitmap image, made the frames separately and pasted them.

Then I used OpenOffice.org Draw to export the bitmap image as PDF."


assignment
Click on the image to see larger version.

Niri0n in Sweden has completed this assignment (png). Click on the image to see larger version. (23 May 2007) Good job! 10 points


assignment
Click on the image to see larger version.

Wachapon2 has completed this assignment (png). Click on the image to see larger version. (2 June 2007) Good job! 10 points


assignment
Click on the image to see larger version.

Tunderboy9 has completed this assignment. (13 July 2007) Good job! 10 points


Click on the image to see larger version.
Vijay Singh has completed this assignment. (17 July 2007) Good job! 10 points


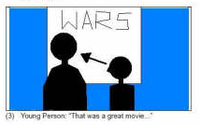
This is the first storyboard which looks like a movie.

The figures are positioned as in a movie. The size of the figures are as in a movie.

Yet, these are still very simple thumbnail storyboards. Please look at these storyboards!!!!


Click on the image to see larger version.
Mok has completed this assignment. (21 July 2007) Very good job! 10 points


Here is a very artistic thumbnail storyboard.

Click on the image to see larger version.
Fred has completed this assignment. (5 August 2007) Very good job! 10 points

assignment
Click on the image to see larger version.

Mpftmead has completed this assignment (png). Click on the image to see larger version. (6 August 2007) 10 points


Click on the image to see larger version.
Izwah has completed this assignment. (6 August 2007) 10 points

assignment
Click on the image to see larger version.

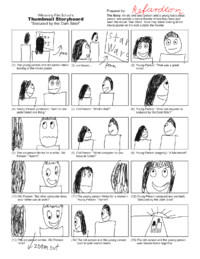
Refardeon has completed this assignment (png). Click on the image to see larger version. (13 August 2007) 10 points


assignment
Click on the image to see larger version.

Noblerinthemind has completed this assignment using GIMP (png). Click on the image to see larger version. (16 August 2007) 10 points


Click on the image to see larger version.

KinnetiK has completed this assignment (JPG). Click on the image to see larger version. (23 August 2007) 10 points


Click on the image to see larger version.

Sushant has completed this assignment (JPG). Click on the image to see larger version. (01 September 2007) 10 points


Click on the image to see larger version.

Tharun Bhascker has completed this assignment (JPG). Click on the image to see larger version. (5 September 2007) 10 points


Click on the image to see larger version.

Moraistelmo has completed this assignment (JPG). Click on the image to see larger version. (7 September 2007) 10 points


Click on the image to see larger version.

Elisia Johnson has completed this assignment (PNG). Click on the image to see larger version. (01 October 2007) 10 points


Click on the image to see larger version.
Sibte Hassan has completed this assignment. (6 October 2007) 10 points


Click on the image to see larger version.
Mattjames17 has completed this assignment. (30 October 2007) 10 points


Click on the image to see larger version.
Cristiana has completed this assignment. (08 November 2007) 10 points


Click on the image to see larger version.
William Lewis has completed this assignment. (13 November 2007) 10 points


Click on the image to see larger version.

Manuelciosici has completed this assignment. (05 December 2007) 10 points


Click on the image to see larger version.

Pruthvirajg has completed this assignment. (10 December 2007) 10 points


Click on the image to see larger version.

Davidmp4 has completed this assignment. (21 December 2007) 7 points


Click on the image to see larger version.
Alideniz has completed this assignment. (01 January 2008) 10 points


Click on the image to see larger version.
Sereyaco has completed this assignment. (03 January 2008) 10 points


Click on the image to see larger version.

Marcus Mac has completed this assignment. (28 January 2008) 10 points


Click on the image to see larger version.

Mike305 has completed this assignment. (01 March 2008) 10 points


Click on the image to see larger version.

Vikram_Acharya has completed this assignment. (30 March 2008) 10 points


Click on the image to see larger version.

Eldorino has completed this assignment. (05 April 2008) 10 points


Completed assignment - Creating the thumbnail storyboard

June 12, 2008 -- Rick14 has created a thumbnail storyboard.


Click on the image to see larger version.


The next page

If you want to try creating storyboards with Art Rage FREE, go to Storyboarding with ArtRage2
Otherwise, you are ready to go to the course on 3D Storyboarding.

Contact your instructor

Your instructor for this filmmaking class is Robert Elliott. You can email me by clicking here.


Your career in storyboarding

Do you like making storyboards?

If you enjoy creating storyboarding, you can make a career of it. There are many kinds of storyboarding, not just for motion pictures. This includes storyboarding for television advertising. That's were you will make most of your money.

Take a look at Above and Beyond Artists Agency - Film Artists:Storyboards for examples from professional storyboard artists.

Reference materials

Reference materials for Seduced by the Dark Side! that you might need.
  • The storyboard outline. Print this script outline and use the numbers on this script for your thumbnail storyboards.
  • The original story. To get additional information for your storyboards, look at the original story.
  • A possible floor plan for the movie set. This will help you plan your shots.