
Computer literacy
| Subject classification: this is an information technology resource. |
| Completion status: this resource is just getting off the ground. Please feel welcome to help! |
If anyone would like to get involved in creating a computer literacy course, please visit the discussion page.
Basic Computer Literacy Task List
[edit | edit source]- Turn on the computer and log in.
- Open a word processing application (e.g. MS Word or OpenOffice Writer), write a brief letter and print it.
- Make a folder in My Documents and save the letter inside it.
- Send an email with the letter created in part 2 as an attachment.
- Look up information on Wikipedia and copy and paste it into a Word or OpenOffice document.
- Create a chart in Excel or OpenOffice Calc.
- Make a short slideshow presentation using a suitable application (e.g. MS Powerpoint or OpenOffice Impress).
- Look up directions in Google Maps.
- Look up public transport timetables.
- Fill out online forms.
- Scan a document or photograph.
- Spam and malware awareness.
Open Microsoft Word/OpenOffice Writer, write a brief letter, and print it
[edit | edit source]Beginners word processing 1
[edit | edit source]- Demonstrate: 'How to open a word processor' ;
1. Go to the Start Menu and click on programs.
2. Look for the word processor and click on it.
3. When it opens, click on "File" toward the left top corner.
4. Scroll down to "New", when the new window appears,click on "Blank Document".
NOTE:(Complete these steps only if you're not already on a new blank document.) Before typing, make sure you have the proper margin.
5. Write ‘Hello , my name is [type your name] and I am from [type your country].’
- Demonstrate: Show how to highlight text
'Hello, my name is [type your name] and I am from [type your country].
1. To highlight the text you just typed above, place the cursor at the beginning of your sentence. Click and hold the left mouse button and slide the mouse to the right until the entire text is highlighted.
- Demonstrate: Change font size, Color, Underline and Make letters bold.
Changing font size:
NOTE: Before you begin your text must be highlighted. Refer to the directions above on highlighting text.
1. Go to the top of your menu bar and Click the "Format" menu.
2. Scroll down and click "Font"
3. Under "size" scroll down to 14. The size of the text should change.
Changing font color:
NOTE: Before you begin your text must be highlighted. Refer to the directions above on highlighting text.
1. Go to the top of your menu bar and Click the "Format" menu.
2. Scroll down and click "Font"
3. Pull down the box "Font Color" and change the font color to any color of your choice.
Underlining Text:
NOTE: Before you begin your text must be highlighted. Refer to the directions above on highlighting text.
1. Go to the top of your menu bar and Click the "Format" menu.
2. Scroll down and click "Font"
3. Pull down the box "Underline" and choose the first single black line.
Practice Exercise: The student writes the following sentence below, underline every second word, and change
each word to a different colorand size.
“I now live in America."
Beginners word processing 2
[edit | edit source]- Demonstrate: How to save a document in 'My Documents'
1. The student should open a new document in Word and write a couple of sentences. For example: ‘Hello , I would like to apply for a job in your company. I am available to work from Monday to Saturday. I hope you can interview me for this job.’
- Demonstrate: Save Document:
1. Click the the 'File' tab in the left corner of the menu bar.
2. Scroll down and click 'Save As' (Verify that the 'Save in' box at the top says 'My Documents' )
3. In the box 'File Name', type 'My First Document'.
4. Press the 'Save' button to the right of that box. The file will be saved to the 'My Documents' folder.
5. After the document has been saved, close down Microsoft Word by clicking the red X at the top right of the page.
- Demonstrate: Open your saved document:
1. Open Microsoft Word
2. To the top left corner of the menu bar, click 'File'.
3. Scroll down and click 'Open'.
4. Make sure the 'Look In' box to the top says, 'My Documents'.
5. In the 'My Documents' window, look for your document 'My First Document'. Double click it. A new window will open your saved document.
Exercise:
1. Have the student edit their document by adding:
Yours Faithfully, [Type your name]
2. After the text has been edited, save the new changes.
3. Close word.
4. Open ‘My Documents’ and open the saved document.
Beginners word processing 3
[edit | edit source]- Demonstrate: Further editing and printing.
Exercise:
The student opens their 'My First Document' and practices formatting the text.
Printing the document:
1. Check to ensure that the printer has paper and is turned on.
2. Click on the 'File' tab, and scroll down to print.
3. Verify the printer name that you will be printing to and make sure its name is located in the box 'Name' If not, click the box, and scroll down until you have located the printer.
4. Once the printer is chosen and you are ready to print, click 'OK'. The paper should be printed to the designated printer.
Close word/writer , remove paper from printer and turn it off.
Exercise:
The student opens and prints their letter
Make a folder in 'my doc' and save the letter inside it.
[edit | edit source]- Scatter a lot of papers around the student desk to demonstrate how hard it is to work disorganized , get a couple of folders and put the papers inside a folder , then put a folder inside a folder.
- Make a folder on the desktop by right clicking , give the folder a name and drag and drop a document on the desktop into the folder.
Exercise:
1. Have the student make a folder on the desktop with their name and drag and drop a document into their folder.
2. Show the student how to make a folder in 'my documents'.Open word and write a sentence then save as into the new folder in 'my documents'.
3. Close 'my documents' and delete the students folder from the desktop.
Exercise:
1. Have the student make a folder in 'my documents'. Then they open word , write a sentence and save as to their new folder.
Look up information on Wikipedia and copy and paste to a word/openoffice document.
[edit | edit source]- Show the student how to go to wikipedia.
- Click on Start-Run-type www.wikipedia.org
- Show the student the range of infomation available, look up the country thet are from, look up a famous person, look up math, look up the heart.
- Close wikipedia.
Exercise The student opens wikipedia and looks up information relevent to them eg their country or state , their profession, their favorite subject in school.
- Demonstrate how wiki hyperlinks work.
Excercise Give the student a list of 10 questions which they have to find the answers to using Wikipedia. If you have more than one student make a competition of it to see who finishes first.
- When did Albert Einstein die?
- What is the capital of Sweden?
- When did WW2 end?
- What is the population of the Republic of Ireland?
- What is the melting point of lead?
- What is 24 deg celcius in Farenheit?
- How many teeth does an adult person have?
- What is the chemical symbol for copper?
- In what country is the city of Lyon?
- Who wrote the book 1984?
- Open word and demonstrate how to cut and paste from wikipedia to word.(use an article from one of the previous questions)
Excercise The student open a wikipedia article and copys and pastes into a word document which they then save into their folder in 'my documents'.
4: Send an email with the letter created in part 1 as an attachment.
[edit | edit source]- Go to gmail or yahoo mail and help the student make a new account , even if they already have email it is good practice in filling out online forms.
- Show the student how to attach a document to an email.
Exercise Have the student send you an email with their letter from part 1 as an attachment.
- Login to you email account and show the student their mail in you inbox and open the attachment.
- This section will be expanded***

5: Draw a chart ic excel/calc
[edit | edit source]- Show the student how to open Calc/Excel and show him a cell, a column and a row.
- Click in a number of cells and have the student name that cell eg A5,F4 ect.
- Show the student how to enter data into a cell.
Exercise Have the student enter the data from 'Calc data entry exercise' into an excel or calc spreadsheet.

Exercise
Have the student make a table of data , one column called NAME , with a list of their families names and another column called AGE with a list of their family members ages.
- Demonstrate to the student how to select the data and use the chart wizard to draw a chart.
- Delete the chart
Exercise Have the student use chart wizard on their data table.
Exercise
- The students main Excel/Calc project is to create a budget for the year and draw charts using different subsets of data.Also the student will learn to perform calculations with excel.
- The first step is to create the following table.

- Then the student fills in the data , if possible the student should use their own data but they can also just copy.

- This is a good place to show the student how to format the table by adding colour and changing cell size.

- Next show the student how to autosum the columns and Auto average the rows.You can show them how to do one of each and let them do the rest.

- Next the student can draw charts using data from different rows and columns.
- Here they can use all the different types of charts until they are very confident with the chart wizard.

- Some cells will have been left empty because they are in the future , this is a good place to show the student how data can be added in the future and the charts will automatically be updated.
6: Lookup directions in Google maps.
[edit | edit source]- Show the student how to start Google Maps. The student will also learn how to navigate.
- Go to http://www.google.com/maps
- Type in the address of where you are (i.e. #### Street Name, City, State, Zip Code #####)
- North, South, East, West
- Zoom In and Out
- Map View
- Satellite View
- Click and Drag
- Exit Google Maps.
Exercise
- Start google maps and enter their address and look around their neighborhood.
- Show the student how to get directions . Type in the address of where you are and Get direction to here from the student address.
- Close Google Maps.
Exercise
- Open google maps and gets direction to their place of work/study for a car and for public transit.
7: Make a short slideshow presentation using a suitable application eg MS powerpoint or Open Office Impress.
[edit | edit source]- Objective: There are going to be two presentations . The first one is an easier one where there will be Text and Photographs.The second one is more advance and will include charts and spread sheets using files from the previous lessons.
- At the end of this lesson the student will be able to make a short slide show presentation.They will be able to use images downloaded from wikimedia/commons.
- For this lesson our presentation will be on African animals.
- Sample Images
-
 Zebra
Zebra -
 Hyena
Hyena -
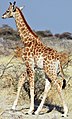 Giraffe
 -
 Lion
Lion -
 Warthog
 -
 Ostrich


- Show the student how to download one of the above images.
Exercise The student makes a folder on their computer and downloads all of the above images.
- Show the student how to launch the slideshow program and make a title page.

- Close The program without saving.
Exercise The student opens the program and makes the title page.
- Show the student how to make the first slide.
Exercise The student make the rest of the slides.
- slide 2

See Also
[edit | edit source]External Links
[edit | edit source]- Microsoft: Digital Literacy Curriculum
- ITdesk.info - project of computer e-education with open access; international e-volunteering project; free and openly available learning materials and certification.