
MakerBot/Quick start guide, Basic steps to print
Overview
[edit | edit source]Locate a *.STL, *.OBJ or *.thing file to print. Makerware takes these files and turns them into an *.x3g file. Makerware creates the *.x3g file in an industry standard g-code format with some proprietary extensions.
Makerware creates the *.x3g file on any file system. The normal printing process is to put this file on an SD card, then put the SD card in the makerbot. The file is then printed through the buttons on the front panel of the makerbot.
MakerWare Software
[edit | edit source]Click on the images below to see more detail. Makerware software is constantly being updated and features are being added. Sometimes an update will require an update of the Makerbot firmware. Please ask a lab manager to do this. This happens so rarely that you should always be using the latest Makerware software.
Number Of Objects
[edit | edit source]The build plate is pretty big. Lots of objects can be printed at the same time. However more can go wrong including:
- hair or spider webs connecting the pieces
- warping causes lifting which the head can then bump into knocking one piece off
- one piece knocked off causes extrusion into mid air which means blob or hair
- which then leads to clogged print head
Advice is to print one object, then two, then go into mass production. If printing something that has many parts that need to be glued/snapped together, put 2 hours of printing at a time on the platform. (See estimating print time below .. advanced settings, export).
Positioning/Scaling
[edit | edit source]-
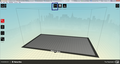 The interface should look like this upon startup. Click either Add, or open in the file menu
 -
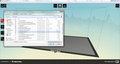 Drag and drop the stl file(s) to print or pick the file(s) from a list
 -
 Once the object(s) has loaded, then position, scale, and arrange your object(s). The biggest mistake is to not place the object on the platform. If it floats above the platform, the print head will clog.
 -
 picture of makerware software scaling an object
 -
 Once the object(s) are set to print, click Make. The next screen has options for naming the *.xg3 file and selecting settings.


Settings
[edit | edit source]Resolution: Applies only to the up/down Z access. The X-Y access is at constant high resolution. A thicker layer (low resolution) will print MUCH faster.
Low resolution is great for test prints, and simple geometrical objects. Standard resolution is the default. High resolution is great for artistic pieces and moving parts WARNING- High resolution objects tend to take MUCH longer!! The longest print so far is 26 hours.
Raft: A raft is a flat piece printed on the build plate. It grips the build plate strongly. Tall, narrow pieces don't touch the build plate very much and have a tendency to break loose or get knocked over during printing. Flat pieces with a large surface contacting the build plate don't need a raft. Large flat pieces can curl on the ends. A raft can help prevent this.
Supports Think of a sand castle. It is hard to make an arch. Overhands are hard for the makerbot also. It is amazing how well it does do overhangs. Supports will eliminate the guess work, but are harder to remove than a raft.
Advanced Settings
[edit | edit source]There is just one reason to click on advanced settings ... to click on the preview box.
Do not change the advanced settings. Do not try to solve the problems by changing the default advanced settings. Talk to a lab aid or instructor. Here are some of the problems.
In-Fill and Shells determine how hollow an object is. Increasing will increase strength but dramatically increase print time and amount of PLA used.
Temperature should be 230 °C or less. Increasing the temperature risks clogging the print head.
Speed do not change. There is a relationship between temperature and speed is complicated.
More can be found in the Makerware documentation.
Export to a File
[edit | edit source]Check Export to a File and then click the export button. At this point a preview will appear.
If you do not see a preview screen, Cancel. Preview screens:
-
 Print time in upper right hand corner
 -
 Sliced through the layers, everything looks good, ready to export
 -
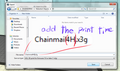 Append print time to the name of the file!!!


