
MakerBot/Cleaning up cloud point mesh in mesh lab for 3D printing
< MakerBot
Purpose
[edit | edit source]Cleaning up a cloud point mesh of an object in meshlab so that it can be printed using a 3D printer.
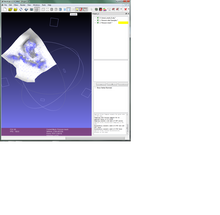
- 1. Open the obj file in mash lab which was taken from the kinect. http://commons.wikimedia.org/wiki/File%3AMesh1.png

SelectPoints

- 2. Zoom in and select points you want to keep by deleting unwanted points. Make a selection around the points you want to keep and then go to filter > render and click on invert selection then press ctrl and delete. This will delete unwanted points from the mesh.

- 3.Get normals using Render > show vertex Normals ( this will create normals which pointing backwards) they need to be recomputed so that the normals are facing forward.

- 4. Recompute normals using filter > pointset> compute Normals for point sets, change number to 16 for the number of neighbors and also check the box for FlipNormals. Change the camera to -1000 so that the sampling program knows that the cloud point data was taken from a large distance, this would give it a better idea where the normals should go.
- 5. Turn on layers, top menu bar.
- 6. Now create a subset of the point cloud, got filters>sampling> poisson-disk sampling, change the number of sampes to 5000 and check the box for base mesh sub-sampling. This will create an even sampling distribution of the cloud points, and will give a general surface to work with.
- 7. Now go to filters > point set > surface reconstruction: Poisson, set parameters, 12 for octree depth and 7 for solver divide, these numbers can be changed depending on the scale of the original cloud point mesh. Make the numbers bigger if the cloud point is big.
- 8. Turn on light, this can found at the top within the tool bar and also turn on smoothing which is next to the light button.
- 9. Now approximate some of the cloud points to add more detail. Do add more points go to filter > re- meshing-simplification and reconstruction > use sub-division algorithm called LS3 loop. This algorithm will add more detail to the cloud point mesh.Sub-sample it three time, --> iterations = 3(this will sample it 3 times, can be done more times, just change the iteration to a high number.)

adding more detail

- 10. Step 9 should give the final version of the mesh which can be printed using a 3d printer.
final image
