Helicopter/Howard Community College/Fall2011/502 Helicopter 3
===
===
- Designing and and understanding the mechanism of gimble
- Differentiate between the gyro and accelerometer
- Also writing many different sketches to understand the differences between the commands used in C++ language.
- Build the base of the helicopter, which include arduino, motor shield, batteries, and the emergency stop button.
- Innovation of the see-saw gimbal.
Team Members
[edit | edit source]===
===
Week1 Activities involved the following:
- Rationalizing Differences and writing sketches for the accelerometer ADXL335 and Gyro-5DOF.
- Looking for tutorials to explain those concepts.
- Uploading all pictures and files from older group to the Wikiversity.
Week2 Activities involved the following:
- Thanksgiving break (we all assumed!)
Week3 Activities involved the following:
- Researching for a new sketch since the previous sketches kept on getting errors
- Looking for gyro-gimble tutorials
- Pushing the see-saw gimble design forward
- Uploading the hardware setup of arduino/Gyro-5DOF
Week4 Activities involved the following:
- Uploading videos of the the work for the arduino
- Putting up previous and new tutorials for the arduino
- Uploading pictures of the acclerometer and gyrogimble
===
===
Story
[edit | edit source]We tried our best to accomplish our goal and to solve the problem. Here are the main activities we planned to do:
Week0
- Working with the arduino, writing/editing the sketch, and taking pictures and videos. All these weeks, we have tried our best to push the Arduino-Helicopter project forward.
Week1
- Looked at the main difference between 1) Accelerometer ADXL335 has x,y, and z axis of rotation and measures the acceleration of each and 2) Gyro-5DOF has 5 Degree of Freedom, meaning x,y,z axis of rotation, and also including X and Y Rates (measures angular velocity and inclination); uploading pictures from previous projects or researching about other completed projects; made an attempt to fix the see- saw gimble.
Week2
- Everyone took Thanks-Giving[TURKEY!] break.
Week3
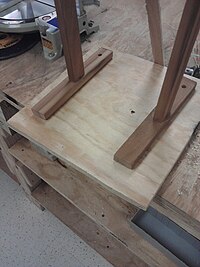
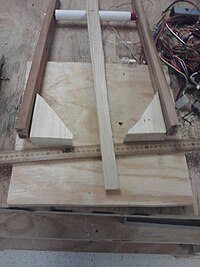
- Researching for a new sketch of the Gyro-5DOF and Accelerometer since the previous sketches kept on getting errors; researching new tutorials of arduino and motor control shield; create something that causes the plane to stop it from moving all the way down; took some sticks from an old project, separated it and hot glue the pieces on the support beams of the see-saw gimbel- this causes the plane to have a restricted movement.
Week4
- Taking a design of gyrogimbal and starting to build one on our own with some variations to it.
- Each individual planned to do different tasks during the weekend and stayed after class for completing the design of the see-saw gimble, base and motor base of the helicopter, and finish writing the gyro sketch.
Material List
[edit | edit source]- 12*11mm(r) stick
- 2x4 Blocks of Wood
- Portable electric Saw
- 10x11 Styrofoam
- Markers
- Nails or Screws
- Drill
- Clamp
- Electric Sander
- PBC Pibe. 3 feet
- Hot glue
Software List
[edit | edit source]- Computer- OS=Windows XP
- Arduino Software
- Serial Chart Programming
- Processing Software
- Serial Monitor from arduino
Time
[edit | edit source]- Total of 9.5 hours on notebook along with presentations for each individual
- Time spent working on completing the see-saw gimbal = 3 hours
- TIme spent writing/editing sketches of arduino = 11 hours
- Time spent on uploading pictures along with editing Wikiversity = 2 hours
All over time each individual spent doing the project = 25.5 hours and for all = 102 hours
Tutorials
[edit | edit source]- Gimbals-Lock Explained- a brief video explaining how gimbal works and also he uses an aircraft as its center object which clarifies the meaning of using Gimbal when showing the difference between the two devices.
- Gimbals-Video Explanation- a brief video which explains the angular rotation of each x,y, and z axis and uses processing software for better view.
- Gimbals Picture- a simple picture showing the basic structure of gimbals.
- "Quadcopter Prototype using Acc_Gyro and a Pic": is a project tutorial Posted on June 9, 2010 by Starlino. He has completed the same projec, yet using a different system board.
- Link to his libraries
- Link to the Serial Chart files .scc: the files provide different charts based on their INPUTS/OUTPUTS. The files ONLY support PicQuadController.
- Processing Code: the file gives you the code for Processing and only supports PicQuadController.
Next Steps
[edit | edit source]Each team member did their best to push the project forward and achieve the desired tasks. As part of the project, we have completed building the see-saw gimble to balance the propellers of helicopter. We didn't get enough time to balance the propellers, so it's better for new comers to take over the project from here:
The next part of the project will include the following:
- Connecting the base to motors and the arduino system
- Connect helicopter to see-saw gimbal and analyze the data
- Find a way to incorporate Gyro-5DOF into the helicopter system
- Write a sketch that also includes wireless controller
- HAVE FUN! (with FRUSTRATION???)


