Arduino Robot
Group Members:
.

Arduino Robot Project 1
[edit | edit source]Our first project idea is an arduino Robot
General
[edit | edit source]- Task: Design, build, and program a working robot using arduino.
First Step
[edit | edit source]Brainstorming Ideas
[edit | edit source]- line tracking
- wall sensing
- Obstacle avoiding robot
- Temperature detecting robot
- Pipeline fracture detecting Robot
- Maze maneuvering robot
- Voice recognition and commands
Necessary Design Specifications
[edit | edit source]Durability
[edit | edit source]Any product we create will need to be durable. It will need to be able to travel and move without falling apart and stay a solid working creation.
Should be able to withstand 4ft drops.
Toughness
[edit | edit source]Without a tough robot we do not have a robot. It will need to withstand some force without crumbling.
Size
[edit | edit source]The smaller the better. A smaller size will concur a faster, easier to turn, and less bulky product. Smaller size has infinite advantages.
Complexity
[edit | edit source]As engineers we are looking to make our robot with as few moving parts as possible and keep coding short; therefore the less complex the better.
Maneuverability
[edit | edit source]The easier it is for the robot to move and turn the easier it will be to keep the other specifications in order.
Cost
[edit | edit source]Completing the project on a college student budget means that we keeps costs to a minimum and try to build it out of salvaged parts. Nonetheless a integral specification that makes all the difference in projects.
Estimated Development Time
[edit | edit source]Limited amount of time means picking and choosing what to do when. After all, meeting deadlines is part of being an engineer.
Decision
[edit | edit source]Obstacle Avoiding Robot (Subject to change)
[edit | edit source] *According to our decision matrix, this was the best and simplistic decision.
*Simple
*Intro to arduino to build on
*Intro to bread boarding and circuitry

Materials
[edit | edit source]- Arduino Uno
- Arduino Motor Shield
- 2 Motors (1 from printer, 1 found)
- Sonar/Distance sensor
- Bread board and wires
- Body/vehicles
- Wires
- Power Supply
Prototyping
[edit | edit source]
- We chose a body for our robot. An old R/C car works as a perfect pre-existing structure for us to build around.
- The R/C car provides a area that the arduino fits on to properly and an existing back motor & wheel setup easily programmable to move the vehicle.
- The R/C Car also provides a modifiable front axle that we can transform to meet the requirements and demands of our robot.
Trouble Shooting
[edit | edit source]- Finding a suitable way to get the axle to turn left and right using one motor. We have many design and ideas, but choosing and putting one together has been difficult.
Turning Point
[edit | edit source]Disappearance
[edit | edit source]- Our project was stolen and never recovered. Although at this point it was only a simple body with an arduino attached, it still required us to begin from scratch.
Next Steps
[edit | edit source]Rebuilding
[edit | edit source]- We had many design ideas for the new Arduino Bot. Here are three sketches:
New Materials
[edit | edit source]- The Materials remained about the same.
         *Sonar
         *Wheels
         *New Arduino
         *Motor Shield
         *Cover/Battery Pack
         *Wires
         *Breadboard
         *Metal Mesh Plate
Assembly
[edit | edit source]- The initial assembly was simple due to the fact that we had already built one arduino bot and had a good idea what we wanted this one to look like.
- We used soldering as a way to make sure all metal components linked together.
Final Product
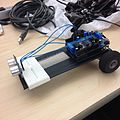
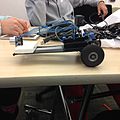
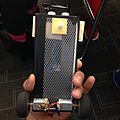
[edit | edit source]- We did produce a working prototype of our initial design. It has some bugs(as any beginner would incur), but for the most part is fully functional. We have conducted a few tests and the Arduino Robot does work in every single one. A rough sample video can be found at Our Arduino Robot and Our Final Arduino Robot
- Our final design:
CAD Rendering
[edit | edit source]We used Autodesk Inventor to create the CAD models. These were created to add an extra view of our Arduino Bot and enhance our documentation.
Presentation
[edit | edit source]- A progressive Google Drive Presentation of all documented work also available at Arduino Robot Presentation


