Engineering Projects/Model boat/Howard Community College/fall2011/502 AHZ
Electronic Sections Expected
[edit | edit source]Problem Statement
[edit | edit source]- Construct a remote operated Model Boat from scratch by using the following http://www.youtube.com/watch?v=i7sXMtcex6g Video. Boat Will be controlled with two RC remotes.
- Generate a sketch from which the Model Boat can go in any direction without tilting over.
- Design a balance system so the boat does not flip over due to high pressure waves.
Team Members
[edit | edit source]Put each team members name here with links to their personal page here. Real names do not have to be used.
Summary
[edit | edit source]The main purpose of our project was to Establish a model boat that can run in water. We started off by looking at some different boat designs. While looking through the set of designs, we found a unique design that we choose for our boat. The boat was made from tube and all the other gadgets were placed on it. We choose that design because it was different from what we have seen before and was unique as well. We started focusing on making of our boat by gathering all the materials and assigning work to team mates. Beneath is the timeline of the work that was being done every week.
Week0
- Brainstorm ideas for the design of model boat.Researched the materials that can be used in designing the boat. Understood the objectives and assigned work to team mates.
Week1
- Gathered all the materials that were needed and started working on the project.Getting the tube as we did earlier in the project was one of the most troublesome tasks in this project. But, we had gotten the tube out of the bicycle successfully to use it for the project. Later on, we got the new tube to use.
week2
- Worked on the base of the boat by cutting a board and attaching it with a tube. Also, compared and contrasted two different pairs of fans that could help the boat move forward and control the direction.
week3
- Started working on the fans and propeller of the boat. Attached them to the boat and tested to see if they worked properly.
week4
- Goal was to connect the RCA remote with the boat and control it. Placed all the remote parts in the plastic bottle to prevent them from getting wet.Figured out how to make the boat turn right left and go back in the water.
These are some pictures related to the work that was being done.
-
 Glue
Glue -
 fans
fans -
 tube
tube -
 transmeter
 -
 reciever
 -
 Materials
 -
 Side fans
 -
 Testing of the fans
 -
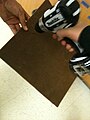
 sanding the plastic pipe
 -
 view of propeller attached on the top of the plastic pipe base
 -
 Front view of the boat with propeller on


Testing of the fans: http://www.youtube.com/watch?v=fDk-Jf-qwwE
Poster
[edit | edit source]Story
[edit | edit source]Our goal as a team was to accomplish a model boat and to operate it moving in the water freely without any problems. We started off by making and testing different kinds of designs and by collecting the parts that were need in order for the boat to be made. After discussing the design, we finally came to the conclusion of making the boat with a bicycle tube.The tube that we had was very big about 26 inches in diameter, so, we decided to give it a twist to fit underneath the wooden board. We tied it with the board with the help of black ties as shown in the poster pictures. Then, we researched on different types of fans that will be best to push the boat forward. We found a set of two white fans with high voltage motors, and we thought that these will be the best ones for our model boat. The fans were attached on the top of bases with the help of hot glue firmly.Basically, were thinking of using them to push the boat forward and to guide the direction at the same time. If turn one fan off the boat will turn the same direction of what the fan has. Later on, we started working on the propeller which was meant to be the real push for the model boat. We provided it with a base of about almost five inch long plastic tube. We placed the the propeller at the top of the plastic tube with the help of the hot glue. We also placed a 20 oz clear water bottle in the front of the boat to prevent the RC unit from getting wet. The bottle was cut open from the top to place the RC unit in, and it was supposed to be sealed later on.
Decision List
[edit | edit source]Selecting the design of the boat was one big decision that all the team mates had to take. We all threw different ideas at each other and came to a conclusion of using the tube design for our boat.
We had a couple of designs in our mind to work on which include:
Using soda bottles to make the design
Use the tire tube in the design
Make it and shape it out of wood completely
Material List
[edit | edit source]Some of the Materials that are need:
- 2 Remote Control
- Bicycle 26" tube
- Wood
- Glue
- Drill
- Engine/motor
- Propellers
- high voltage fans
- Batteries
- Plastic Bottle
- supports for the fans
More materials will be added to the list
Software List
[edit | edit source]Used 'image composer' software that was installed in the ENGSOFT folder to create the poster for our project.
Time
[edit | edit source]The amount of time we spent on pushing the project forward was 5-6 hours weekly and 2 class periods. That makes a total of 24 hours for each and a team total of 72 hours.
Tutorials
[edit | edit source]Doing research and understanding how the boat works and whats the mechanism behind it was the most important part of the project. Links on user-pages of our team members can be very helpful in understanding the making of the boat.
Next Steps
[edit | edit source]Next step is to use and operate the following remote to control our Model Boat. Basically work on the electronics and make the boat turn in water. The next steps are to to hook up the RC controller and coil with Arduino to guide the direction of the boat and to turn it on and off.
