MakerBot/Kinect
< MakerBot
Purpose[edit | edit source]
The purpose of this tutorial is to assist students who are trying to create a depth image or point cloud using The Xbox Kinect.
Kinect: Procedures[edit | edit source]
Using Xbox Kinect's point cloud feature to scan objects for 3D Printing
Steps[edit | edit source]
- 1. Download Processings from http://processing.org/. The is a free IDE for creating interactive programs using 2D, 3D or PDF output.
- 2. Create a folder in "My Documents" and name is Processing
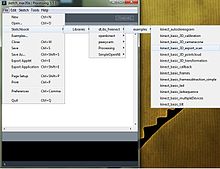
- 3. Create another folder inside Processing and name it “Libraries”, this is the folder where all the libraries associated with running depth data and cloud point data software will be stored

Folder structure for the Processing IDE

- 4. Download drivers and software from https://github.com/diwi/dLibs, download and unzip in the "libraries" folder
- 5. Install Drivers using the device manager and manually install each driver from "C:\Documents\Processing\Libraries\dLibs_freenect\library\kinect_driver_windows" folder. This path can be used to find all three drivers.

Drivers for Kinect

- 6. Install all three drivers manually using the device manager(Plug in the Kinect First).
   -Follow the steps in the InstallingDrivers image.
   -Repeat the process for all three drivers.
- 7. Open Processing and navigate to file > sketchbook > libraries >dlibs_freeKinect > Examples > kinect_basic_3D_export_scan. This will open the code that will be able to scan and save a depth image. Press the run button at top left hand corner and a new window will appear showing the depth data. Press the M key to export mesh, data is saved in the kinect_basic_3D_export_scan folder in the processing folder in my documents.
file path

Saving Point Cloud Data From Kinect[edit | edit source]
- 8. Open the point cloud library in the processing IDE
- 9. Press the "M" key to save the point cloud data. The file is saved in the kinect_basic_3D_export_scan folder in the processing folder.

saving point cloud data from Kinect

- 10. The file extension is .obj. This means that the point cloud files are saved as object files and can be opened in any 3D software package.
Alternative Method[edit | edit source]
Purpose[edit | edit source]
With the proper easy to follow procedure one will be able to use the Kinect to capture a 360 degree 3D view of an object
RGB-Demo[edit | edit source]
- 1. Visit the RGB-Demo website, go to the "Download" page and download the all in one driver package named "Zigfu"

- 2. Extract the files from the .zip folder and install each driver manually going through the Control Panel > Device Manager > Kinect (Plug in/Disconnect the USB to the computer to find the right Com port if it is not recognized)> Properties > Hardware > Properties > Driver > Update Driver > Browse my computer... > Browse... > Find the extracted driver (Repeat for each driver, installing them in the order they appear in the Zigfu folder)
- 3. Download and extract the RGB-Demo software

- 4a. For 360 degree views try using calibrate-kinect-ir.exe. I have not had success with this execution file, but this may be because I did not install the drivers manually. I just realized this as a possible solution after reading my partners tutorial above. After calibrating the Kinect (or perhaps calibration is an unnecessary step), 3D scanning using rgbd-scan-markers should work to capture a 360 degree view point cloud. I will update this tutorial if I get this step working. Otherwise, the following steps will stay for a simple procedure to create a point cloud, mesh, and object file for a perspective view of an object.
- 4b. Use the rgbd-viewer or rgbd-reconstructor to see a color image and a RGB (red-green-blue) image through the Kinect
- Note: Use the execution files one at a time, otherwise they crash

- 5. Use the grab-mesh (automatically captures mesh) or rgbd-reconstructor (use start button) to capture a point cloud which is saved as a .ply (polygon) mesh in the RGB-Demo folder
- 6. Download and install MeshLab (search google)
- 7. Refer to our tutorial on cleaning up Point Clouds in MeshLab to push your project towards 3D printing