Adobe Photoshop/Workspace
The Photoshop Workspace[edit | edit source]
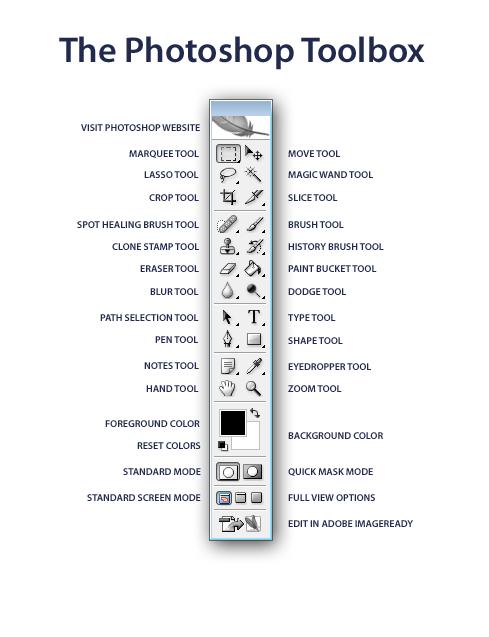
The image below is a screenshot of Photoshop's default workspace. There are seven key elements of the default workspace, keep in mind that you can change the workspace to better suit your needs. The first key element is the canvas (not labeled), the canvas is the editable white area where your artwork is displayed. The next thing you'll notice is the menu bar, these menus are where you'll find all the functionality of photoShop. You'll be learning more about the functions found in these menus in a later lesson. To the left of the screen is the tools palette. As the name implies, the tools palette contains various tools found in Photoshop, as well as basic view and color controls.
To the right of the screen is the navigator window, the navigator can be used to move around the canvas. In most cases, the navigator will not be needed. However, you might find use for it when working with especially large images. Below the navigator window is the color window, which can be used to quickly mix colors and get colors from swatches. Another key element in the workspace is the history window, this window is very helpful for undoing mistakes and keeping track of which edits you have performed. Lastly, you'll see the layers window, this is a critical part of the photoshop workspace, it helps you manage all the layers in your artwork. We'll be discussing how to use the layers window and the concept of layered editing in another lesson.
Toolbox[edit | edit source]

